Pages

Monthly Challange

Monthly Challenge is
Here

Thursday 29 December 2011

WEEK 9 CHALLENGE

Hello Bloggers and i hope you enjoyed our last MEGA 2week challenge, i know i enjoyed looking at all your entries. So what do we have instore for you this week, well for starters our fantastic sponsor this week is


and your inspirational photo is

WOW look at all those lovely bright colours, such a lot of inspiration to be had there. Here's what out DT members have come up with


Kelly M


The DT cant wait to see what you come up with for this weeks challenge, please link up below

Happy Crafting


Monday 26 December 2011

Week 4 winner and Top 3

Firstly I want to apologise for us being late in announcing our recent winners, but i am glad to be able to tell you now that the winner for our week 4 challenge is number

Jacky

and our top 3 are number

11  Jenny B

Congratulations to you all, please could you contact Kelly at kmsmith@sky.com for your prize and blog badges.

I hope you have all had a wonderful Christmas and that you will continue to join in our challenges in 2012

Happy Crafting


Thursday 15 December 2011

Week 7


Hello Bloggers.


Today we have 3 wonderful sponsors.


As it's so close to christmas we thought we would run this challenge for two weeks.

Our first sponsor is Joanna Sheen


Who has kindly going to give our winner £10 to spend in her store.


Our Second sponsor is


For our winner there will be some digi stamps from Stamping Dragon.


Our third sponsor is


The winner will receive 3 digis from their store.


This weeks inspirational photo is


Here are the fabulous designs from the DT


Vicki


Kate


Kelly M


We can't wait to see your creations. Don't forget this challenge lasts for two weeks.


Thursday 8 December 2011

Week 6

Welcome to week 6 of our challenges. This week we are sponsored by


Robyn's Fetish Digital Stamps And More, a division of I Did It Creations, was created and is owned by Robyn Weinrib. Robyn offers a wonderful variety of digital stamps and digital papers, designed to meet the needs of all digital paper crafting addicts for every occasion.


This weeks inspirational photo is


A tasty looking gingerbread house in front of a highly decorated and colourful christmas tree. Stock Photo - 6121295


Kate has done us this freebie. If you would like to use it on your creation that would be wonderful but it's not a requirement.Here are the designs from our fabulous design team.


Vicki


Kate


Kelly M


The prize this week is a choice of 5 digi stamps from Robyns Fetish our sponsor. We'll be looking forward to see your creations this week. This will end on Thursday 14th December.


Wednesday 7 December 2011

Week 3 WINNER and TOP 3

I am happy to announce the winner of our 3rd challenge is

number 6 Sammibug
congratulations, please contact Kelly kmsmith@sky.com
 to claim your prize

and onto the top 3

number 9 Catherine
number 10 goldie
number 7 TRACEY

well done to the top 3, please take your badge from the blog.

Thankyou for all your entries, they are all great in their own way and all the DT love looking at them all


WEEK 2 WINNER & TOP 3

Hi all

firstly an apology for the winner and top 3 being late, we have been having a few blogging problems here, but its all sorted now.

So onto the winner of our WEEK 2 challenge

number 3 Mcihele S

and the TOP 3

number 11 Croms
number 9 Jan Hunnicutt
number 14 Debbie

well done to everyone, all the design team love looking at all your projects each week. Would the winner please contact Kelly at kmsmith@sky.com
to claim your prize and the top 3 please help yourself to a blog badge


Sunday 4 December 2011

Week 5

Welcome bloggers to this weeks challenge. This week we are sponsored by Stamp and Create.


Powered by Zen Cart :: The Art of E-Commerce

Here's the Inspirational Photo for this week


Here are the fabulous designs from our DT

Caroline


Kelly M


This week our challenge will end on Sunday. I hope you will join in and be in with a chance to win a fab prize from Stamp and Create. We can't wait to see what you create this week.


Thursday 24 November 2011

Week 4

Hi Bloggers, HAPPY THURSDAY and welcome to our WEEK 4 CHALLENGE.
This week we are sponsored by
Shelly's Images

and your inspirational photo this week is


Here are the gorgeous makes from our DT this week


Kate

Kelly M

Caroline

Vikki


Kate has also made a great circle sentiment for you all to grab and use on your christmas projects. You do not have to use it on your entry for this weeks challenge, but it would be fab if you did


I hope you will all join us this week and be in with a chance of wining digis from Shelly's Images, we cant wait to see your creations.


Thursday 17 November 2011

WEEK 3


Hello Bloggers
and welcome to our 3rd weekly challenge. WOW it doesn't seem possible that its week 3 already, i can still remember being super excited about being on the design team for this new challenge blog.
So enough of me waffling on, here's your inspiration for this weeks challenge

awwww now isn't that a cutie, and our fabby sponsors this week are

so the lucky winner this week will be able to get something great from Crafty Sentiments Designs

Here's what the design team came up with this week


Caroline


Kelly M


Kate


Sadie

I cant wait to see your gorgeous creations for this weeks challenge.
Happy Crafting
Kate xxx


Monday 14 November 2011

Tutorials!

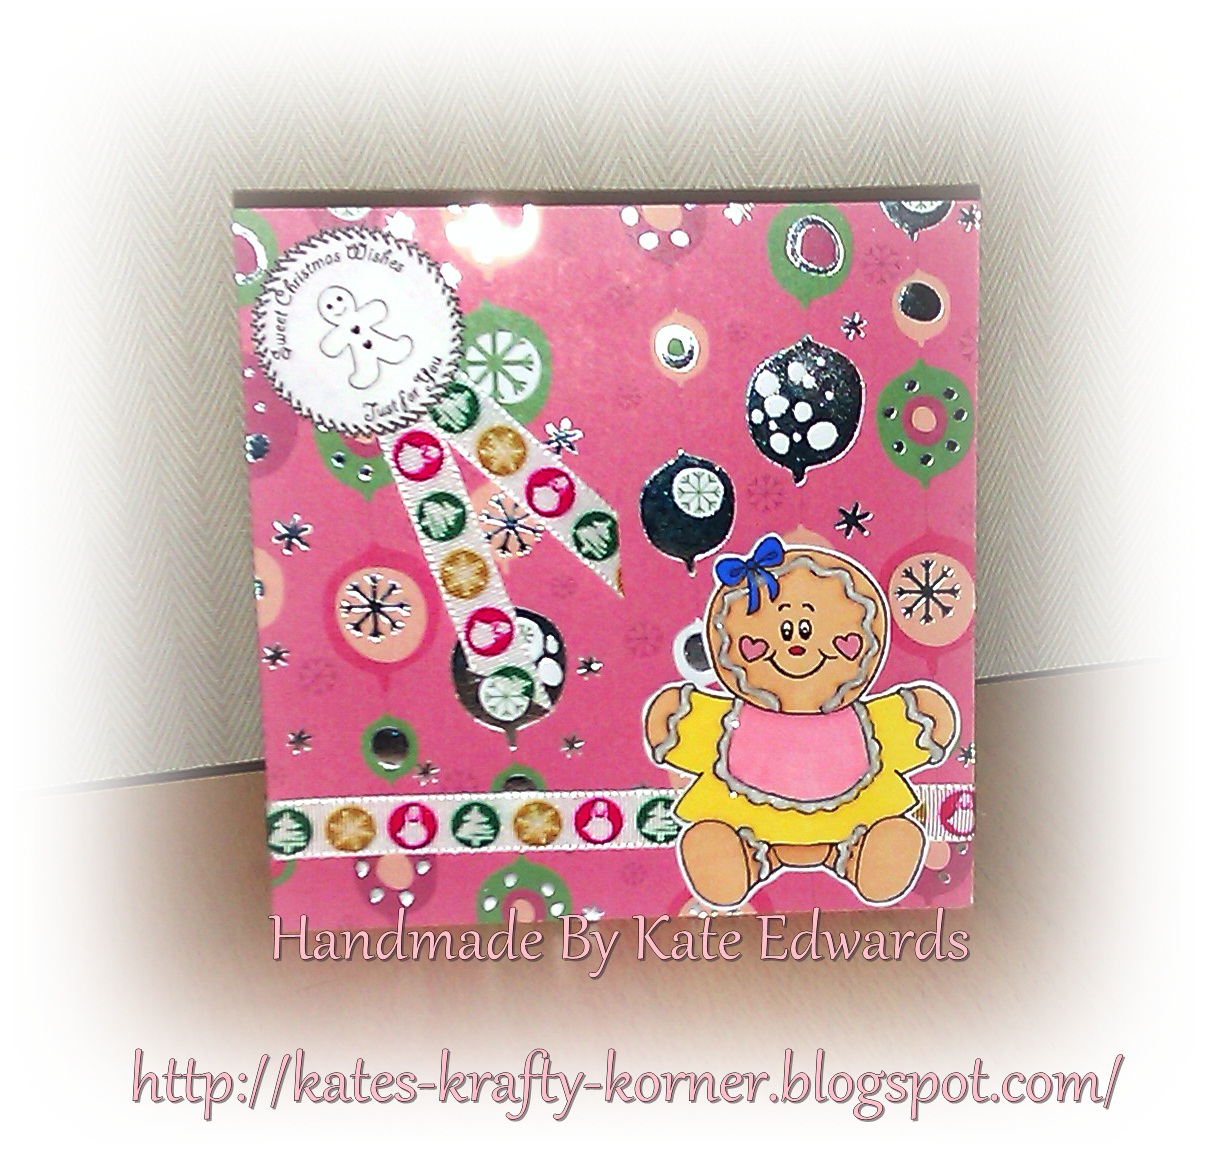
Be sure to check out our Tutorials page, the design team will be adding some fantastic tutorials over the next few weeks.  Kate has made one for a gorgeous gift box, perfect for all those little christmas presents!

Cute Christmas Box

Hi bloggers,
I thought i would add a little tutorial on how to make a sweet little box for Christmas gifts. These can be made in whatever size you like, for the tutorial i am making a 6cm square box using plain card, but you could use decorated card just as easily.
So here we go:

WHAT YOU WILL NEED
A4 SHEET OF CARD , RULER , SCISSORS , PENCIL , CRAFT KNIFE , DST , PAPER CREASER & MAGNETIC PAPER.


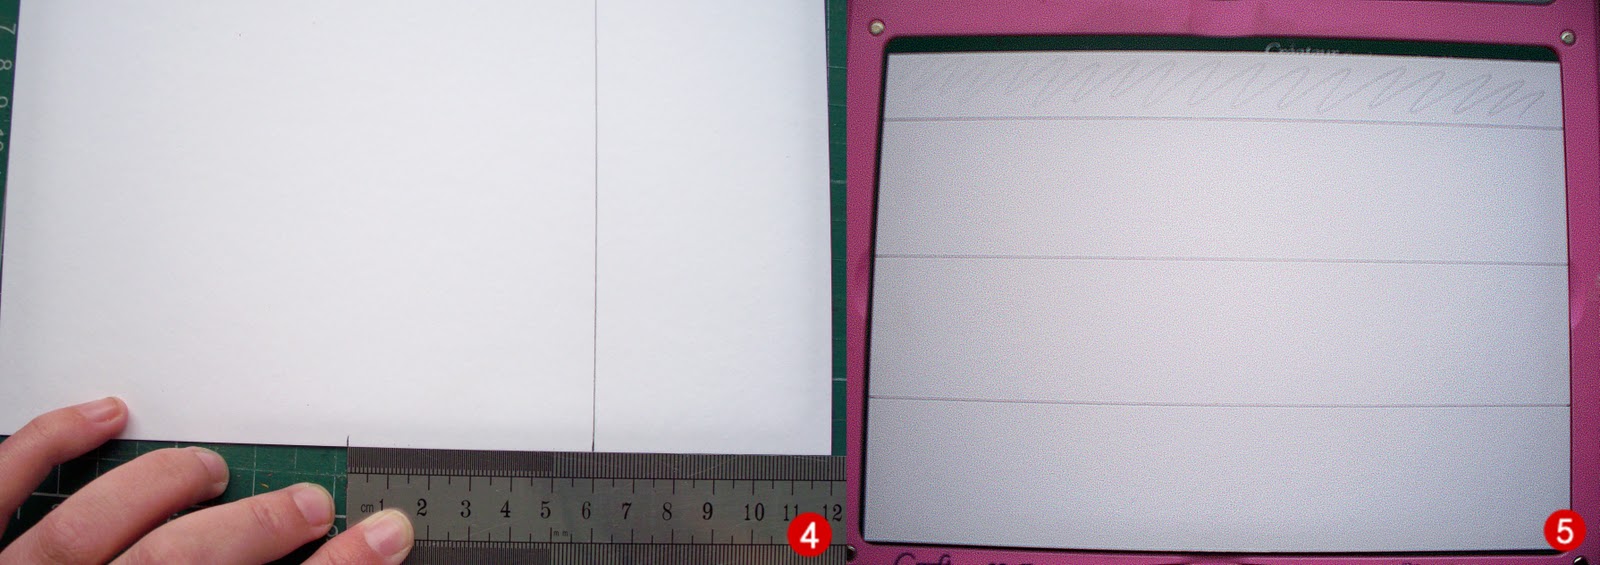
STEP 1. MEASURE 6cm UP FROM THE LONG SIDE OF THE A4 SHEET OF CARD AND MAKE A SMALL MARK.
STEP 2. REPEAT AT THE OPPOSITE END OF THE SHEET OF CARD.
STEP 3. LINE THE RULER UP ON BOTH MARKS AND DRAW A STRAIGHT LINE BETWEEN THEM.


STEP 4. MARK 6cm UP FROM THE LINE AGAIN BOTH ENDS AND DRAW A LINE CONNECTING THEM TOGETHER.
STEP 5. REPEAT THE ABOVE STEPA AGAIN SO YOU END UP WITH 3 LINES ALONG THE LENGTH OF THE CARD 6cm APART.


STEP 6. ON THE 1ST LINE YOU HAVE DRAWN MAKE A MARK AT 6cm , 12cm , 18cm , 24cm & 25.5cm.
STEP 7. REPEAT STEP 6 ON THE 2ND LINE AND THEN JOIN ALL THE MARKS UP AS SHOWN IN THE PHOTO.


STEP 8. MAKE A MARK 1cm TO THE LEFT OF THE TOP AND BOTTOM 1ST LINES AND 1cm TO THE RIGHT OF THE TOP AND BOTTOM 2ND LINES. JOIN UP THESE MARKS
STEP 9. CUT AWAY ALL THE SHADED AREAS IN THIS PHOTO AND YOU WILL END UP WITH THE SHAPE IN STEP 10.


STEP 11. MARK 1cm IN FROM BOTH ENDS ON THE 4 THINNER 'FLAP' SECTIONS.
STEP 12. JOIN THESE MARKS TO THE ENDS OF THE THIN 'FLAPS' WITH DIAGONAL LINES, AND CUT AWAY THE SMALL SHADED TRIANGLUAR AREAS.
STEP 13. YOU SHOULD HAVE THIS SHAPE NOW. SCORE ALONG EACH OF THE PENCIL LINES LIGHTLY WITH YOUR CRAFT KNIFE.


STEP 14. BEND INWARDS ALONG THE SCORE LINES.
STEP 15. USING YOUR PAPER CREASER RUN ALONG EACH OF THE FOLDS PRESSING HARDER TO GET A NICE CREASE IN YOUR CARD. YOUR BOX IS NOW STARTING TO TAKE SHAPE.


STEP 16. IF YOU ARE USING A PLAIN CARD THIS IS THE TIME TO DRAW YOUR DESIGN/PATTERN ON THE BOX. TURN IT OVER SO THE SIDE WITH THE PENCIL LINES ON IS FACING DOWNWARDS AND DRAW ON THE PLAIN SIDE. I HAVE USED A PAPERMANIA GOLD PEN TO DO A SWIRLY DESIGN ALL OVER MY BOX, YOU DO NOT HAVE TO DRAW ON THE 4 THIN FLAPS AS THEY WILL NOT SHOW.


STEP 17. STICK DST TO ALL 4 OF THE FLAPS, I FIND IT BEST TO COMPLETELY COVER THE FLAP WITH DST AND HAVE USED 2 DIFFERENT WIDTHS HERE.
STEP 18. TAKE THE PAPER FROM THE DST ON THE FRONT 2 FLAPS 1ST AND STICK TO THE BACK OF THE FRONT PANEL.
STEP 19. REPEAT FOR THE BACK 2 FLAPS AND STICK TO THE INSIDE OF THE BACK PANEL.

YOUR BOX IS NOW MADE, ALL YOU HAVE TO DECIDE IS HOW TO SECURE THE LID.


USING 2 STRIPS OF MAGNETIC PAPER 6cm X 1cm STICK 1 TO THE FRONT OF THE BOX A FEW mm FROM THE TOP AND THE OTHER TO THE BACK OF THE FRONT FLAP. THESE WILL NOW CONNECT AND HOLD THE BOX LID CLOSED.

 OR


USING 8cm OF RIBBON MAKE A LOOP AND STICK THE ENDS TOGETHER WITH DST. STICK TO THE FRONT OF THE LID FLAP SO SOME OF THE RIBBON LOOP IS STICKING UP ABOVE THE LID. INSERT THE LID FLAP INSIDE THE FRONT OF THE BOX SO THE BOX IS CLOSED BUT YOUR ARE ABLE TO PULL THE RIBBON TO OPEN THE LID.

YOU ARE NOW FINISHED WITH THE MAKING OF YOUR BOX, NOW ITS TIME TO GET THE GLITTER GLUE AND SPARKLEY THINGS AND DECORATE.


I hope you found my tutorial easy to follow, and if you have any questions please do not hesitate to get in touch.

Happy Crafting
Kate xxx

Challenge #1 - Winners

Thank you to everyone that entered our first challenge! It was great to see how our picture could inspire you all.

Our first winner will receive 7 digis from Bugaboo!
It was extremly hard for the DT to choose but:

The winner is: NUMBER 4 - LISA H!!

Congratulations, please contact Kelly for your prize!

Our top 3 are :


Congratulations! Please grab your winners badges from the sidebar.